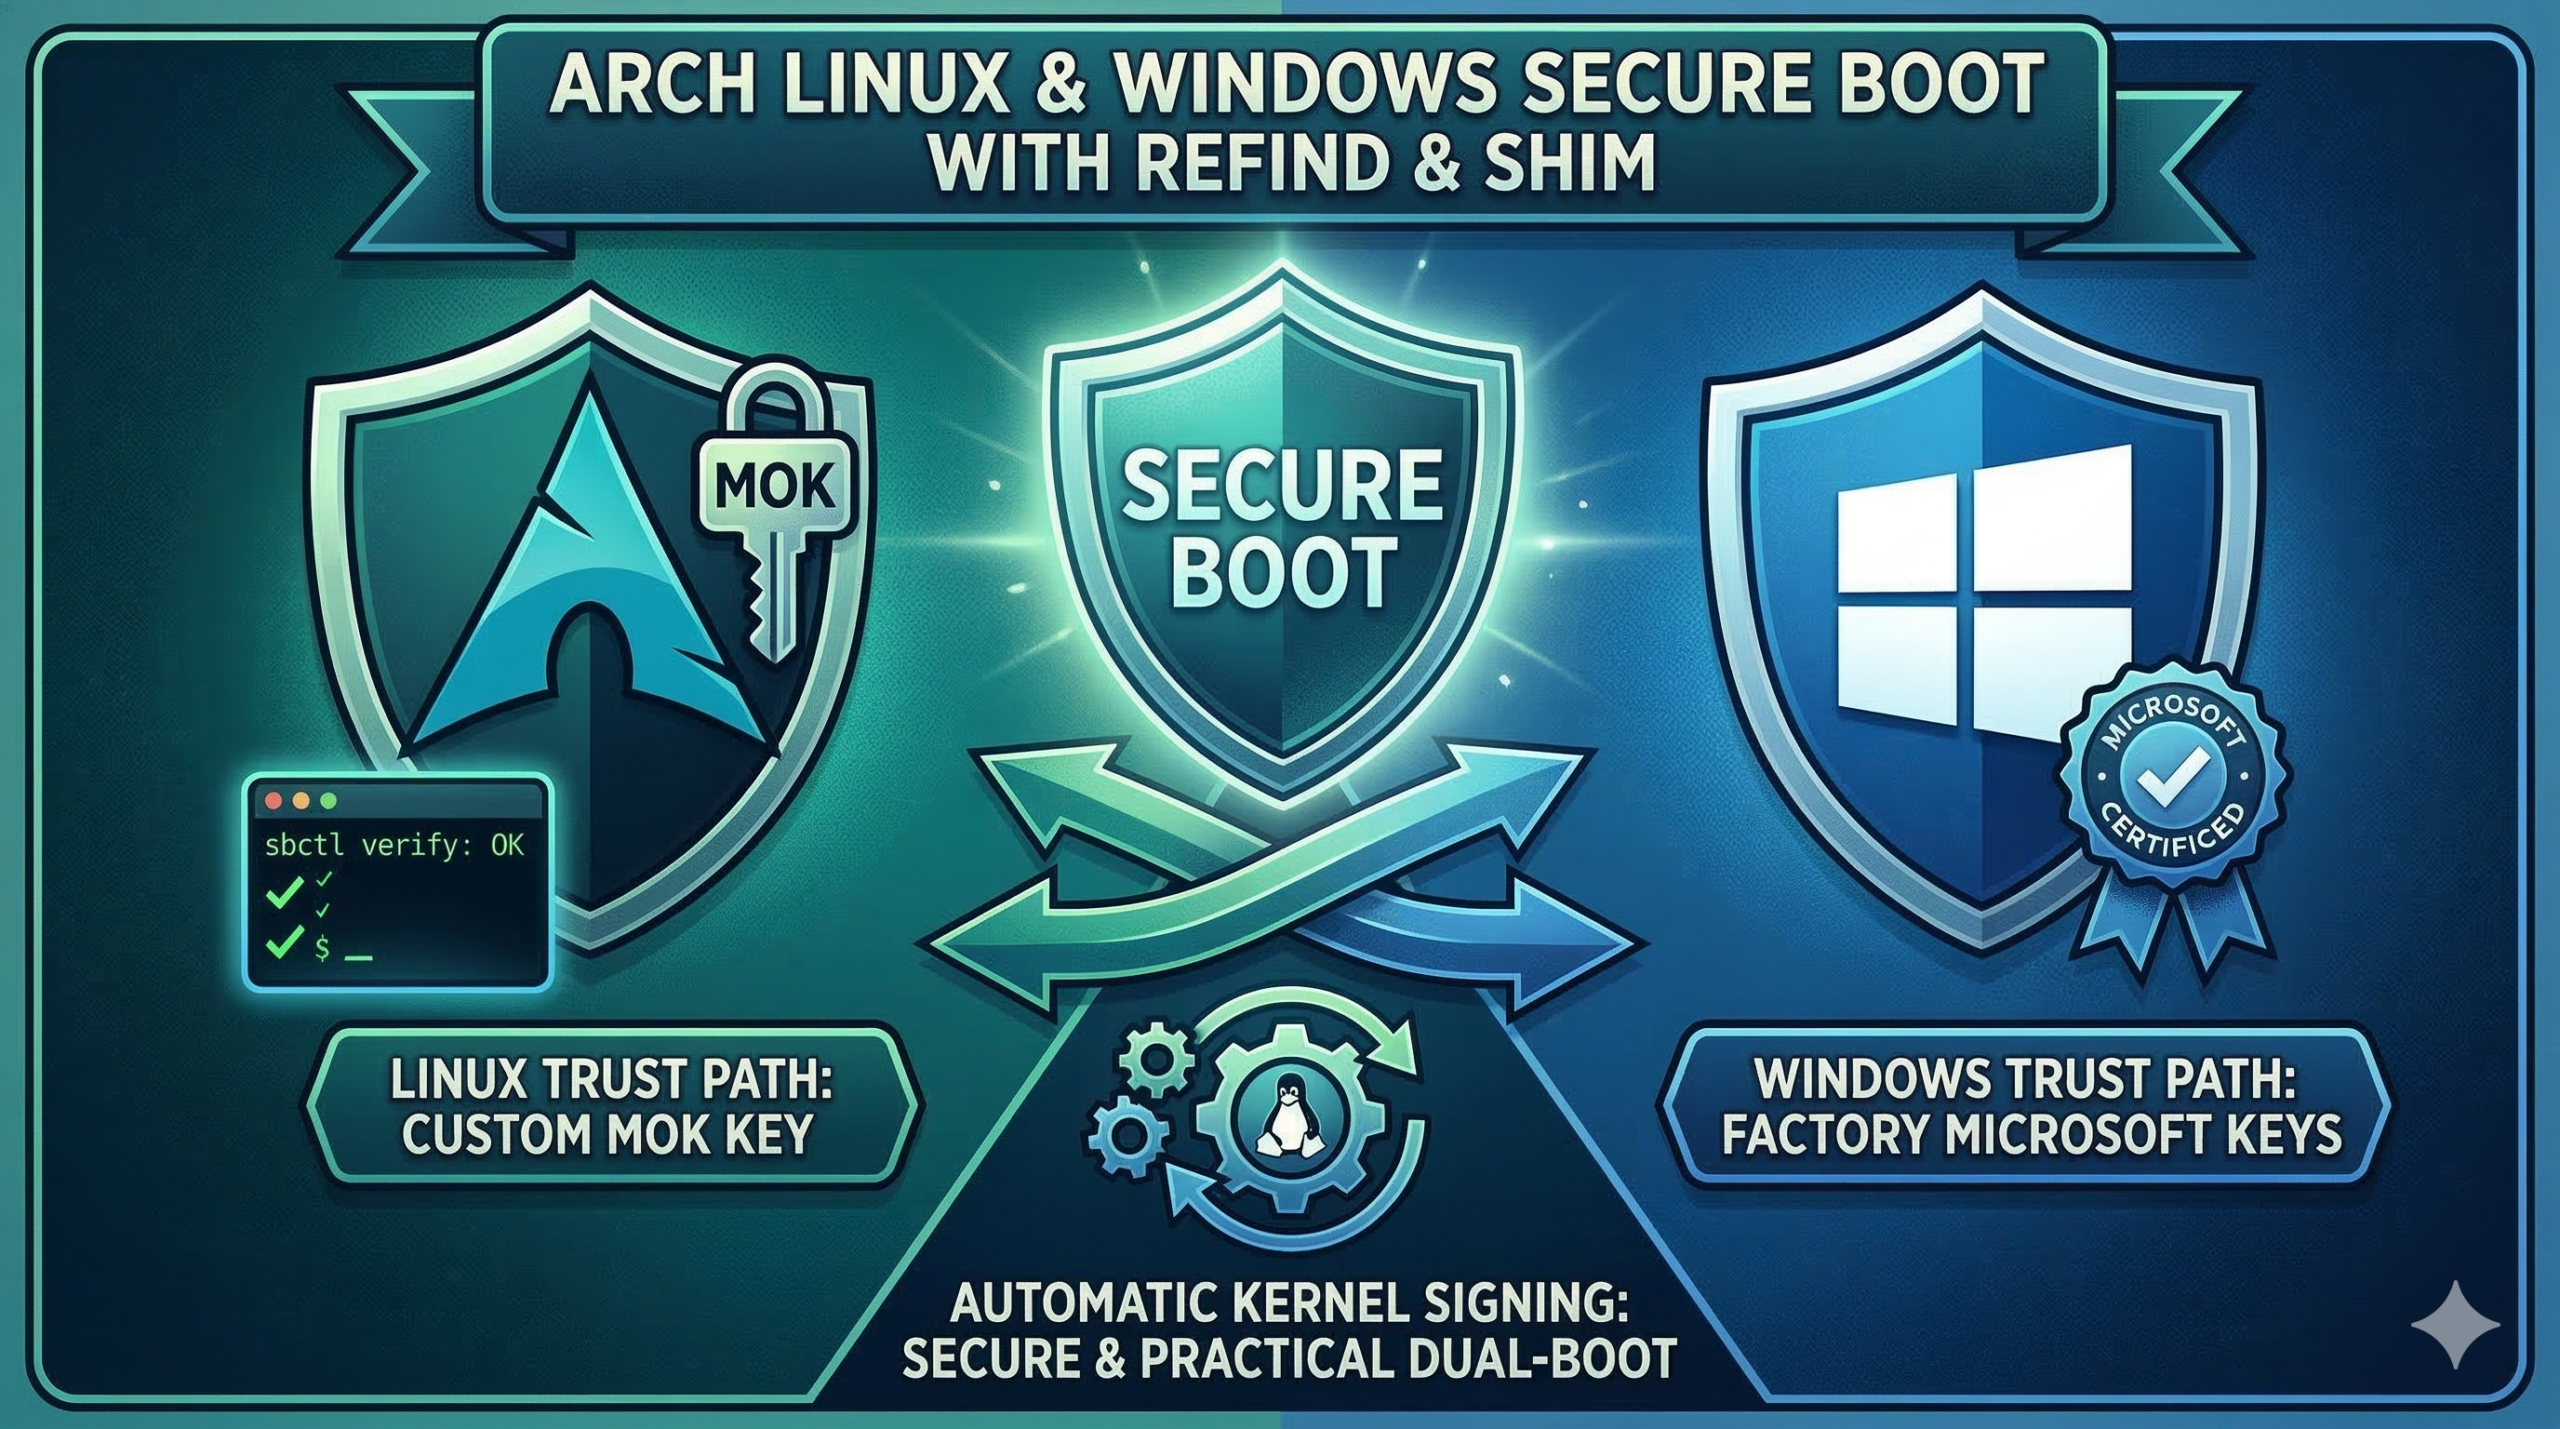
Arch Linux Windows Secure Boot sounds more complicated than it really is. If you dual-boot Windows and Arch Linux, you can keep Secure Boot enabled for Windows, keep rEFInd, use your own Linux signing key, and stop manually approving every new kernel.
If you dual-boot Windows and Linux, you may have run into an annoying problem: some Windows games or anti-cheat systems want Secure Boot enabled, but Linux becomes a hassle because every new kernel seems to break the boot chain.
The usual bad outcome looks like this: Windows wants Secure Boot on, Linux technically boots with Secure Boot too, but every kernel update sends you back to a blue enrollment screen where you have to approve a new kernel by hand. That gets old very quickly.
This guide shows the safer, more practical way to set things up so that:
- Windows still uses Microsoft Secure Boot trust.
- Linux uses your own signing key.
- rEFInd still works.
- New Arch kernels keep getting signed automatically.
- You do not have to manually approve every kernel update.
This article is written for normal users, not firmware experts. I will explain the moving parts in plain English first, then give the exact steps.
Arch Linux Windows Secure Boot Explained
Secure Boot is just a trust system. Your motherboard firmware asks a simple question before it loads something:
“Do I trust the signature on this boot file?”
Windows works out of the box because your PC firmware already trusts Microsoft’s signing chain.
Linux becomes annoying when people use the wrong trust model.
There are two common ways Linux users end up handling Secure Boot:
- Hash-based approval using tools like
and1PreLoader. This is the annoying method. It trusts one exact file hash at a time. A new kernel means a new hash, so you get asked again.1HashTool
- Certificate-based approval using a signing key. This is the good method. Every new kernel signed by the same trusted key is accepted automatically.
This guide uses the second method.
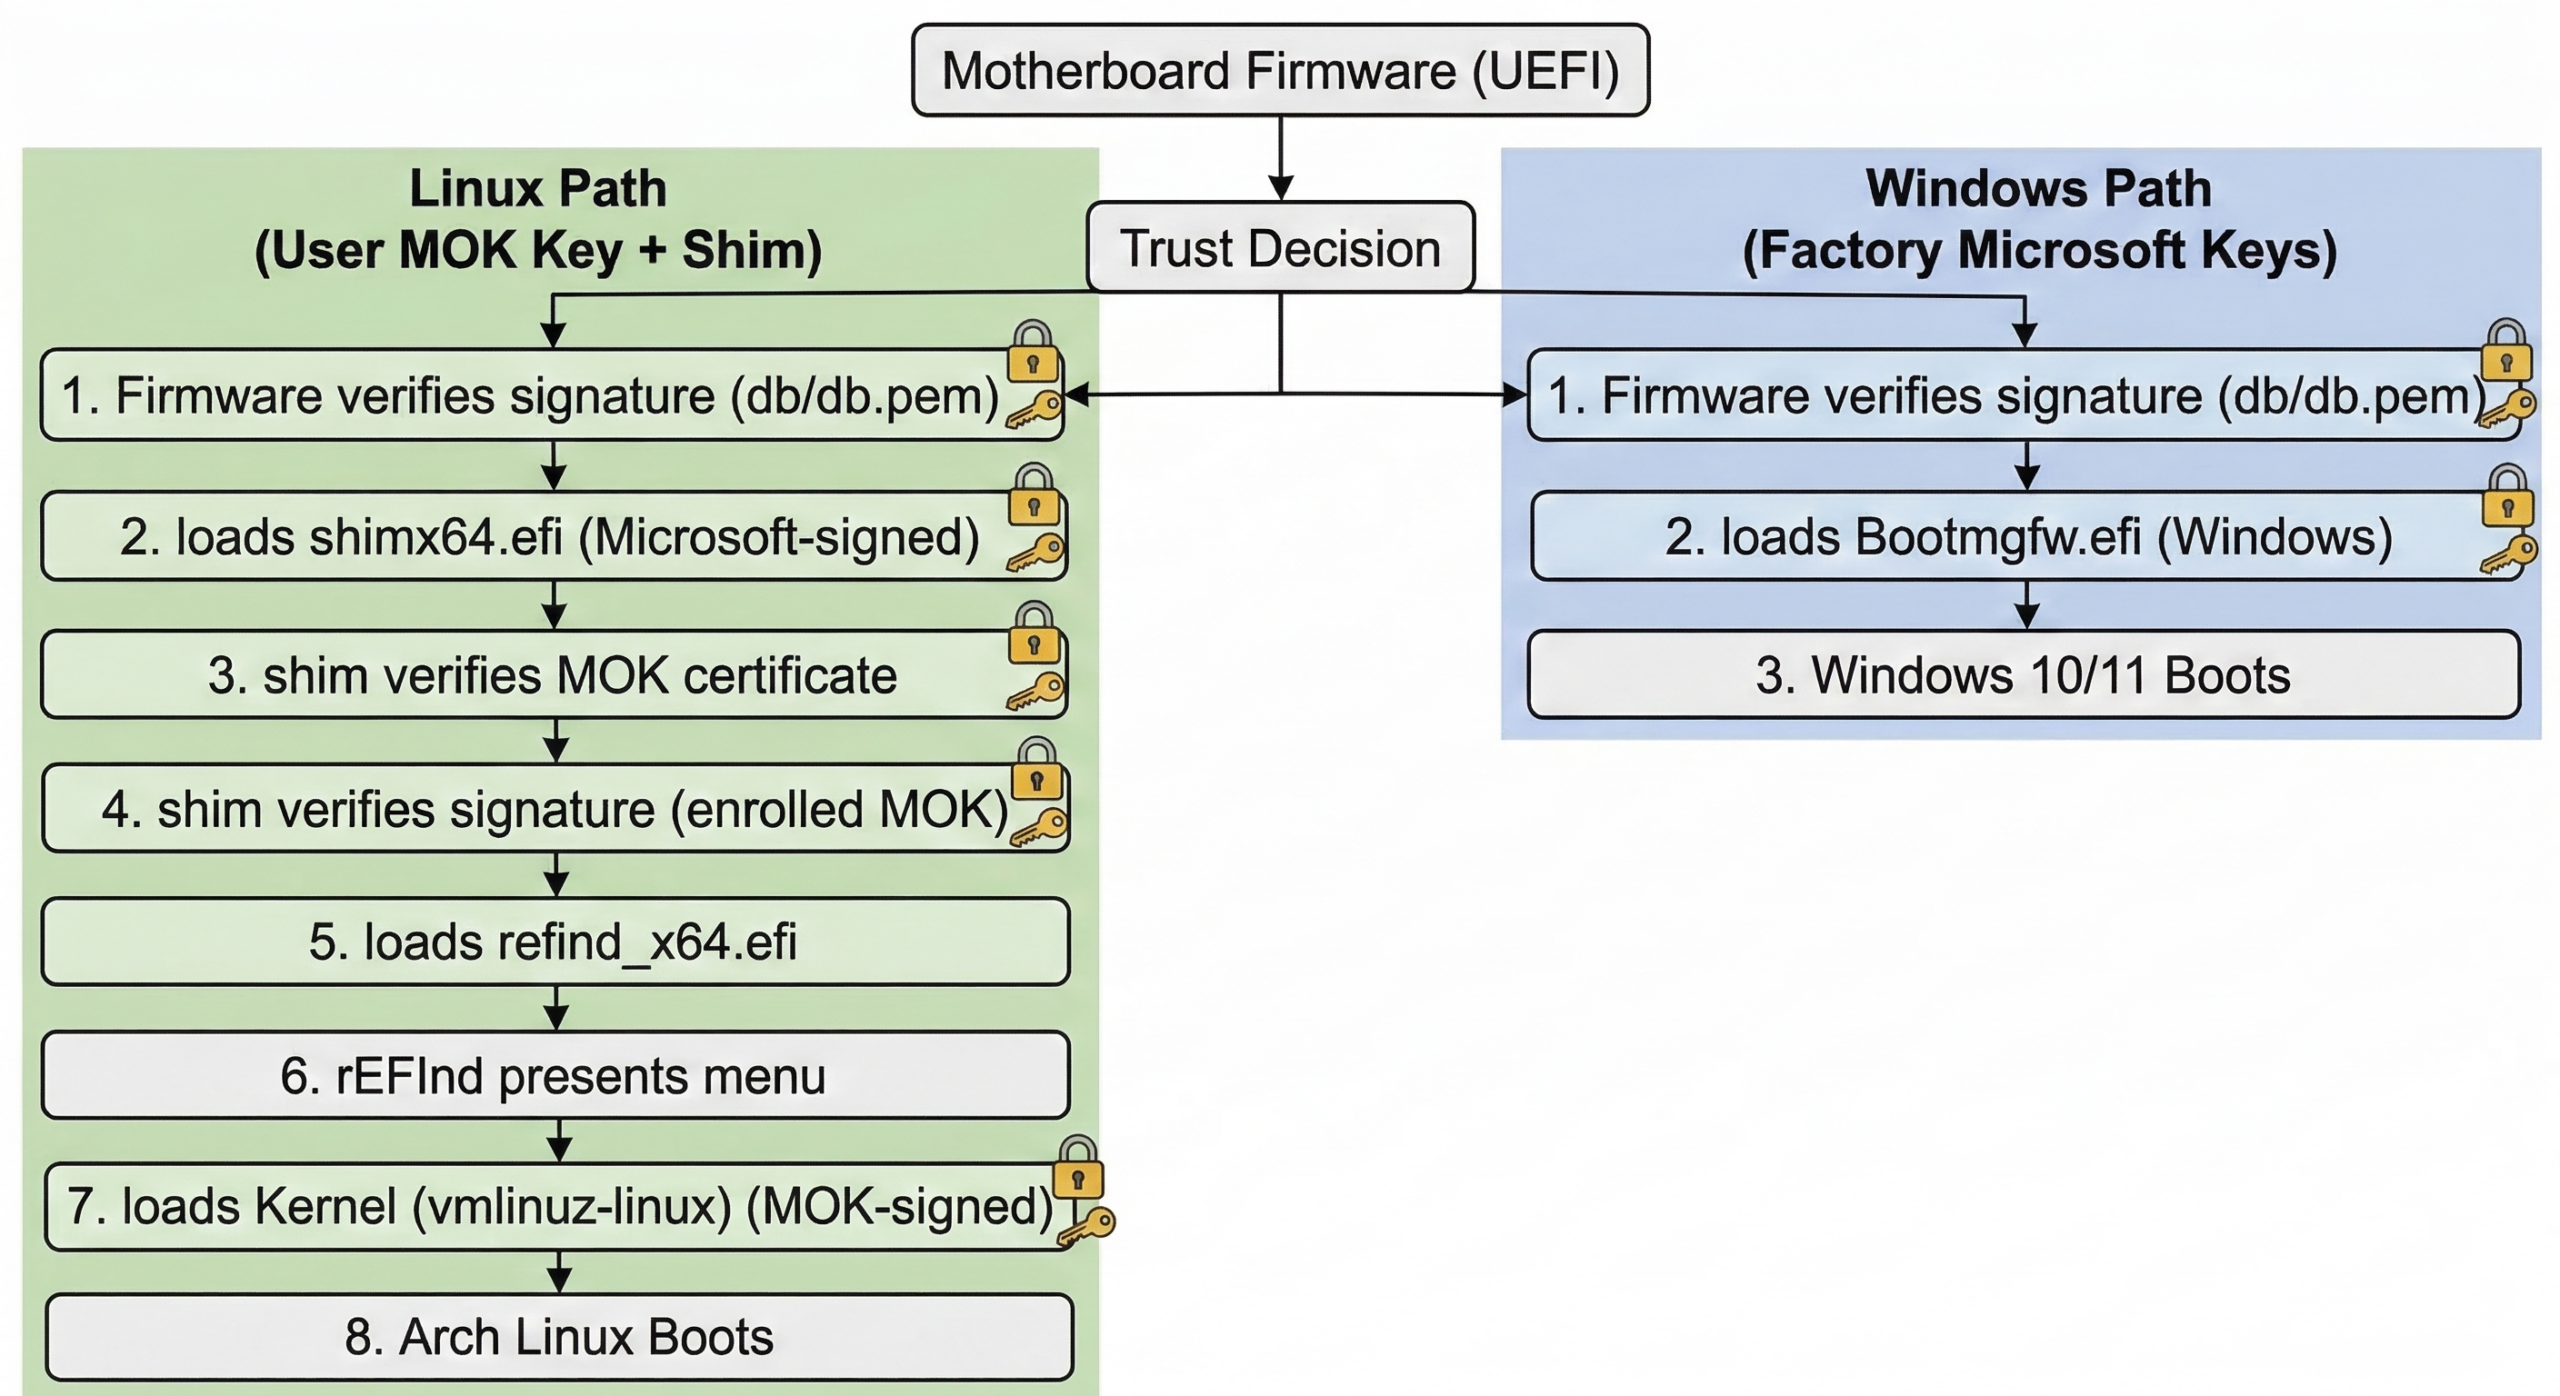
The Safe Model for Arch Linux Windows Secure Boot
There are two broad ways to do this correctly:
- Replace the firmware key databases with your own PK/KEK/db setup while still keeping Microsoft’s keys.
- Keep the firmware on the factory Microsoft/OEM keys, then use
plus your own MOK (Machine Owner Key) for the Linux side.1shim
For most people, the second option is safer and easier.
That means your final trust chain looks like this:
- The motherboard firmware trusts Microsoft’s key.
- The firmware loads Microsoft’s signed
.1shimx64.efi
-
trusts your own enrolled MOK certificate.1shim
- Your rEFInd Linux-side EFI files and your kernel are signed with your own key.
- Windows still boots with Microsoft’s trust path.
That gives you the “best of both worlds” setup most dual-boot users actually want.
Who This Guide Is For
- You use UEFI, not legacy BIOS booting.
- You dual-boot Windows and Arch Linux.
- You use rEFInd.
- You want Secure Boot enabled for Windows.
- You do not want to manually re-approve every new Linux kernel.
If you use GRUB instead of rEFInd, the overall idea is the same, but some file paths will be different.
Before You Start
Make sure you understand these three warnings:
- Do not randomly clear Secure Boot keys in firmware. That is not needed for this guide.
- Do not use the rEFInd “direct” entry for Secure Boot in this setup. You want the
path.1shimx64.efi
- Do not keep relying on PreLoader/HashTool for normal use. That is exactly what causes the manual per-kernel approval problem.
Also make sure Windows is already booting in UEFI mode and Linux is booting in UEFI mode too.
Packages You Need on Arch
Install the tools first:
|
1 |
sudo pacman -S --needed refind shim-signed sbctl sbsigntools mokutil |
What these do:
-
: your boot manager.1refind
-
: Microsoft’s signed first-stage loader for the Linux side.1shim-signed
-
: generates and uses your signing key.1sbctl
-
: low-level signing tools used by the Secure Boot ecosystem.1sbsigntools
-
: lets you import your key for one-time MOK enrollment.1mokutil
Check What Your Firmware Is Currently Booting
This is worth checking before you touch anything:
|
1 |
efibootmgr -v |
You are looking for entries similar to these:
-
1Windows EFI Boot Manager
-
pointing to1rEFInd Boot Manager1shimx64.efi
-
pointing to1rEFInd Boot Manager (direct)or another direct rEFInd binary1grubx64.efi
- possibly a
entry1PreLoader.efi
For this guide, the important Linux entry is the one that goes through
|
1 |
shimx64.efi |
.
Why PreLoader and HashTool Cause So Much Pain
Let us make this part crystal clear, because this is where most confusion comes from.
If you use
|
1 |
PreLoader |
and
|
1 |
HashTool |
, you are usually trusting a specific file hash, not a reusable certificate. The moment your Arch kernel updates, the file changes, the hash changes, and the firmware no longer recognizes it.
That is why you keep seeing a blue screen after kernel updates.
If you instead sign Linux boot files with the same reusable key every time, then the firmware or shim accepts the new files automatically as long as they are signed by that trusted key.
Step 1: Check Whether sbctl Already Has Keys
|
1 |
sudo sbctl status |
If it already says installed, you probably already have keys under
|
1 |
/var/lib/sbctl/keys/ |
.
If this is your first time, generate the keys:
|
1 |
sudo sbctl create-keys |
This creates your own signing material. In the common Arch setup, the certificate you care about lives here:
|
1 |
/var/lib/sbctl/keys/db/db.pem |
Step 2: Sign the Linux-Side EFI Files and Kernel
These are the important files in an rEFInd setup that boots the kernel from an ext4
|
1 |
/boot |
partition:
- The Linux kernel itself, for example
1/boot/vmlinuz-linux
- The rEFInd second-stage binary that shim launches
- The rEFInd ext4 driver, because rEFInd needs it to read the kernel from an ext4 partition
On a setup like the one described in this article, the commands look like this:
|
1 2 3 4 |
sudo sbctl sign -s /boot/vmlinuz-linux sudo sbctl sign -s /boot/efi/EFI/refind/grubx64.efi sudo sbctl sign -s /boot/efi/EFI/refind/loader.efi sudo sbctl sign -s /boot/efi/EFI/refind/drivers_x64/ext4_x64.efi |
The
|
1 |
-s |
flag matters. It saves the file in
|
1 |
sbctl |
’s signing database so future updates can be re-signed automatically.
Then verify:
|
1 |
sudo sbctl verify |
You want the Linux-side files you actually use to show up as signed.
Do not panic if old leftovers like
|
1 |
PreLoader.efi |
,
|
1 |
HashTool.efi |
,
|
1 |
shimx64.efi |
, or
|
1 |
mmx64.efi |
do not show as signed by your key. In this guide,
|
1 |
shim |
is trusted because it is Microsoft-signed, and
|
1 |
mmx64.efi |
is usually vendor-signed too. What matters is that the Linux files loaded after shim are signed with your own key.
Step 3: Make Sure Arch Will Re-Sign Files Automatically After Updates
Modern Arch packages for
|
1 |
sbctl |
include a pacman hook that re-signs registered files after relevant updates.
Check that the hook exists:
|
1 |
ls /usr/share/libalpm/hooks/zz-sbctl.hook |
If that file is present, you are in good shape. It is what keeps future kernel or EFI updates from turning into another manual signing chore.
Step 4: Export Your sbctl Certificate in DER Format
|
1 |
mokutil |
wants a certificate file it can import for MOK enrollment. Export the
|
1 |
sbctl |
certificate to DER format:
|
1 |
sudo openssl x509 -in /var/lib/sbctl/keys/db/db.pem -outform DER -out /root/sbctl-db.der |
Step 5: Queue the One-Time MOK Enrollment
Now import that certificate into the pending MOK enrollment list:
|
1 |
sudo mokutil --import /root/sbctl-db.der |
You will be asked to create a one-time password. This is not your Linux password and not your firmware password. It is just the password MokManager will ask for on the next boot so you can confirm that you really want to enroll this key.
Write that password down.
Step 6: Reboot Into BIOS and Enable Secure Boot
At this point, the Linux side is ready. Now you need the firmware side.
Reboot into BIOS/UEFI setup and enable Secure Boot.
Important:
- Do not clear the Secure Boot keys.
- Do not replace the firmware PK/KEK/db if you are following this guide.
- If your board has a choice between a shim-based rEFInd entry and a direct rEFInd entry, keep using the shim-based one.
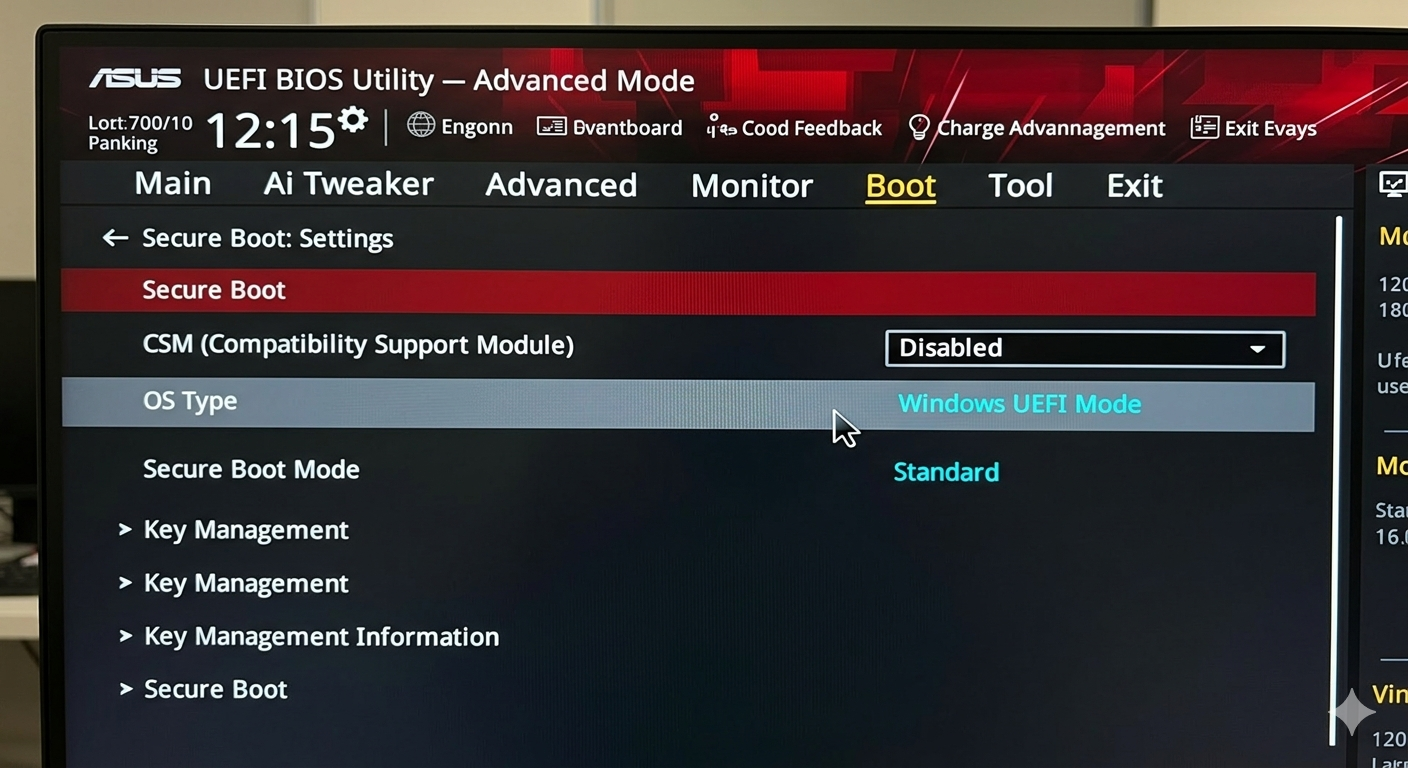
On many ASUS boards, you may also need these firmware settings before Secure Boot will truly turn on:
- CSM disabled
- OS Type = Windows UEFI Mode
- Secure Boot Mode = Standard
The exact wording depends on your motherboard, but the idea is the same: leave the factory trust databases in place and make sure the firmware is really in UEFI Secure Boot mode.
Step 7: Enroll the Key in the Blue MokManager Screen
After you save BIOS settings and reboot, you should get a blue MokManager screen.
This is the good blue screen, not the annoying per-kernel HashTool flow.
Choose the option to enroll the pending MOK, confirm it, and enter the one-time password you created with
|
1 |
mokutil --import |
.
After that, MokManager usually reboots the machine.
From then on, shim knows to trust your own signing certificate.
Step 8: Verify That It Worked
Once you are back in Arch, check the live state:
|
1 2 3 4 |
mokutil --sb-state bootctl status sudo sbctl status sudo sbctl verify |
The healthy end state looks like this:
-
says1mokutil --sb-state1SecureBoot enabled
-
says1bootctl status1Secure Boot: enabled (user)
-
says your Linux-side EFI files and kernel are signed1sbctl verify
- Windows still boots normally through Microsoft’s Secure Boot chain
You can also check whether your MOK certificate is enrolled:
|
1 |
sudo mokutil --list-enrolled | grep -n "Database Key" |
What Happens on Future Kernel Updates?
This is the whole point of doing it this way.
When Arch installs a new kernel, the
|
1 |
sbctl |
pacman hook re-signs the Linux-side files that you saved with
|
1 |
sbctl sign -s |
. In a healthy Arch Linux Windows Secure Boot setup, that means your new kernel keeps working without another manual enrollment routine.
That means you should not have to go through another manual approval screen every time a new kernel arrives.
In other words:
- Windows keeps Secure Boot.
- Linux keeps booting.
- Kernel updates stop being a ritual.
Troubleshooting
Problem: Secure Boot still says disabled after I enabled it in BIOS
This usually means the firmware setting did not actually take effect.
Check these points:
- CSM is disabled.
- The firmware is really in UEFI mode.
- Secure Boot is set to Standard mode.
- On ASUS boards, OS Type may need to be set to Windows UEFI Mode.
If your Linux-side signatures and MOK enrollment are already correct, then this is almost always a BIOS setting issue rather than a Linux signing issue.
Problem: I still see a blue screen every kernel update
You are probably still using the old hash-based path through
|
1 |
PreLoader |
or
|
1 |
HashTool |
, or you are booting the wrong EFI entry.
Make sure your active Linux firmware entry goes through
|
1 |
shimx64.efi |
, not through
|
1 |
PreLoader.efi |
, and not through a direct unsigned loader.
Problem: Windows boots, Linux does not
That usually means one of the Linux-side EFI files that shim needs was not signed, or the wrong rEFInd entry is being used.
Double-check:
|
1 2 |
sudo sbctl verify efibootmgr -v |
Make sure the shim-based rEFInd entry is first in BootOrder, and Windows Boot Manager is second as a safe fallback.
Problem: I use a different kernel or a UKI
Then adapt the paths. The principle is exactly the same: sign the Linux-side EFI binary that will actually be launched, save it in
|
1 |
sbctl |
’s file database, and enroll the matching certificate with MOK if you are using the shim-based method.
Optional Cleanup After It Works
Once the setup is stable, you may want to clean up old firmware entries so future-you does not wonder what is what.
Typical examples of “confusing but no longer needed” entries are:
- the old
entry1PreLoader.efi
- a stale direct rEFInd entry you no longer use
- old fallback Linux entries from previous experiments
This is optional. Do it only after the working path is fully verified.
Final Summary
If you remember nothing else, remember this:
The trick is to stop trusting individual kernel hashes and start trusting a reusable signing certificate.
For a normal dual-boot user, the practical recipe is:
- Keep the firmware’s factory Secure Boot trust for Windows.
- Use Microsoft’s signed
for Linux.1shim
- Sign rEFInd’s Linux-side files and your kernel with your own key.
- Enroll that key once through MOK.
- Let
keep re-signing new kernels automatically.1sbctl
That gives you a Secure Boot-enabled Windows gaming setup and a Linux setup that does not demand manual babysitting every time Arch publishes a new kernel.
Useful References
If you want to read the original documentation behind this setup, these are the best places to start:
More From This Site
If you want more related posts, start here and then replace these search links with direct article links later if you publish more on the topic: