My vibe coding process is not just about typing speed. It is about maintaining a continuous flow state where the AI handles the heavy architectural lifting and implementation details while you act as the conductor. Over time I have refined a specific workflow that keeps code quality high and hallucinations low. If you have already…
Read ArticleHow to Create Swapfile on Linux (Ubuntu, Fedora, Alma)
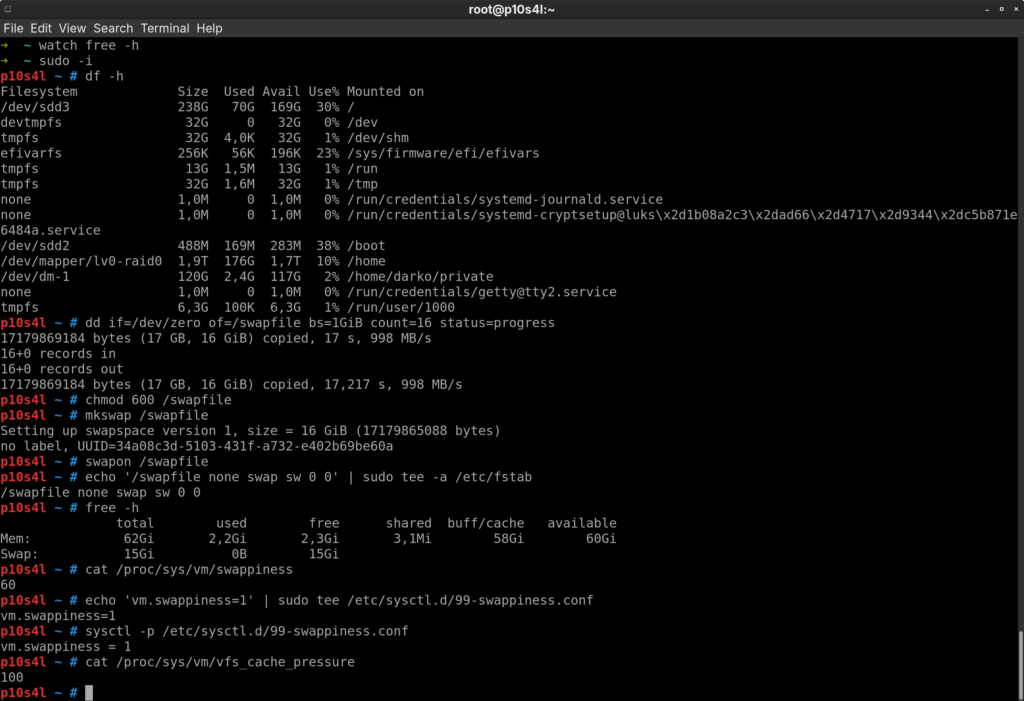
Do you need to create swapfile configurations for your Linux server? Whether you are managing a high-performance VPS or a local workstation, running out of memory can abruptly crash your database or web server. In this guide, we will walk you through the standard process for Ubuntu, Fedora, Debian, and RHEL-based systems like AlmaLinux. Even…
Read ArticleIntroducing Shadniwind: Shadcn UI for React Native & Unistyles
For React Web developers, shadcn/ui changed the game by offering copy-paste components you actually own. Today, we are bringing that same “source-distributed” philosophy to the mobile world with the release of Shadniwind. Shadniwind is a collection of UI components specifically built for React Native and React Native Web. It isn’t just a wrapper; it is…
Read ArticleKalbsrahmgulasch (Rahmschlegel)
Hier habe ich einen echten Klassiker aus den 70ern für dich neu aufbereitet. Das Kalbsrahmgulasch schmeckt herrlich zart und die Soße bekommt durch die Zitrone eine feine Note. Zutaten 500 g Kalbfleisch (am besten aus dem Bug) 40–50 g Bratfett oder Butterschmalz 2 Zwiebeln Etwas Tomatenmark Fleischbrühe (Menge nach Bedarf zum Auffüllen) Abrieb einer Zitrone…
Read ArticleAbandoning Cinnamon Desktop because of Fascist Developers
The new menu sucks ass. It’s a big step backwards. No one likes it. I created an issue. It got closed, “This is not for questions”. Ok I created an issue. “Regression: Revert the menu changes” It got closed too. Now I created a new issue and it will get closed as well. Cinnamon is…
Read Article

